When reaching the deadline of a construction project, a punch list is of great importance. The goal of the punch list is to prepare and submit a comprehensive list of items to be completed or corrected prior to final payment. A checklist is useful to make sure you don’t overlook any important details.
With ArchiSnapper you can set up your checklists from your online ArchiSnapper account and use those checklist from the App during your walkthroughs.
Here below we provide some illustrations on how you can use the checklist functionality within ArchiSnapper to manage punch lists.
It’s important to know that there is an alternative way (other than working with checklists) to draft punch lists with ArchiSnapper: this is by opening a PDF plan from the App and adding observations directly on the plan during your walk-through. Here you can see how this works.
Example 1: working with project specific checklists
1. Prepare checklist online
In this case the categories in the checklist are the specific units (or locations, lots, sections, ...) for this project, for example the entry hall, room 1, room 2, garage, kitchen, ... For each of these units we can then predefine items that want to review during our visit, for example clean windows, electrical, touch up paint, ... Here's an example of such a checklist:
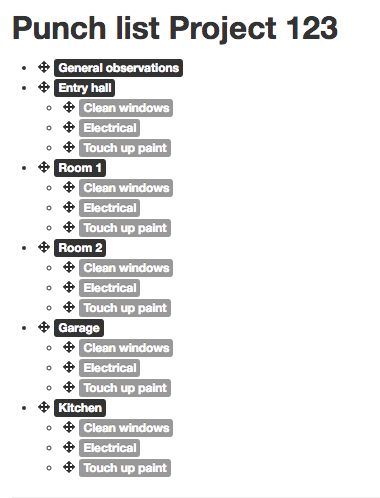
It’s also perfectly possible to include categories without any predefined items, see for example the category ‘general observations’ in the example here above. These categories will be available from the App to add any item you encounter for those categories. In fact, from the App you can always add new items to any category.
2. Use this checklist from the App during walk-through
Here’s a short video that show how we can now work with this checklist from the ArchiSnapper App. You can work with the predefined items as you go through the different units of the building, and add new items for any of your categories if needed (tap ‘add’ button to the right of the category name). For every item you can take pictures (and sketch on them), locate the observation on a PDF plan, assign it to a contact, write notes, ...
3. After syncing the report appears in your online account (for further editing and distribution)
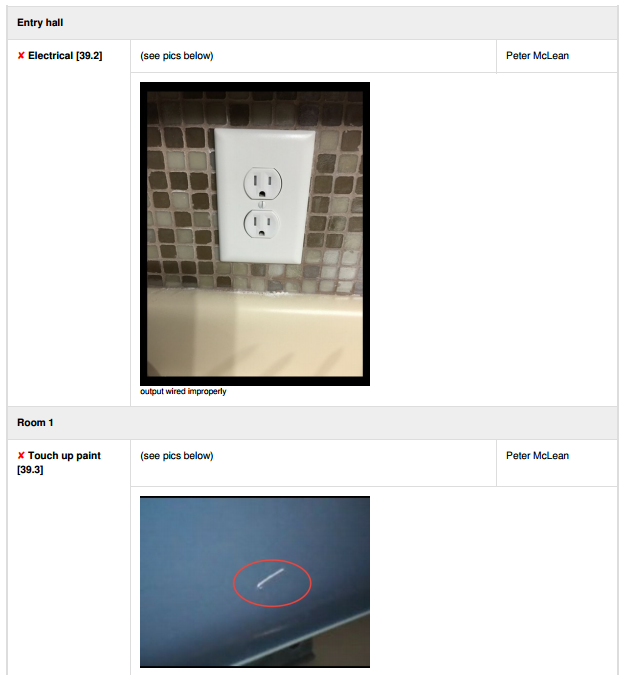
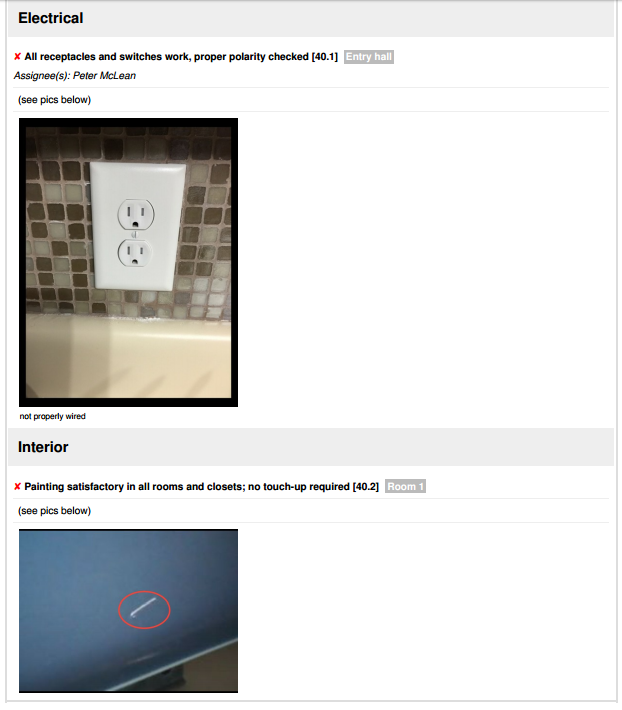
Every observation/item has been assigned a unique number automatically, and for every item we see the pictures, texts and assignees:
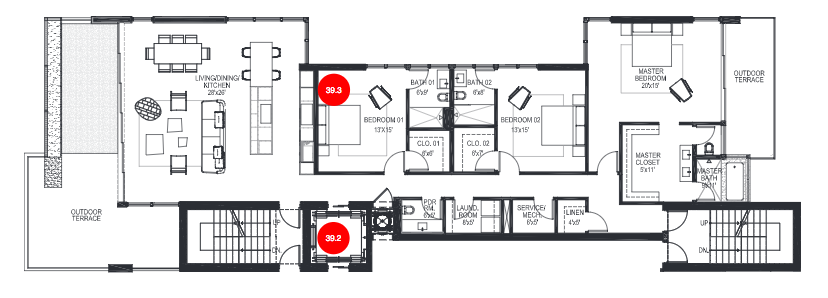
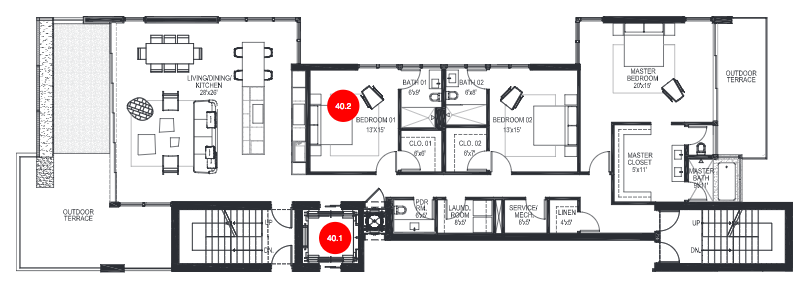
The locations on the PDF plans are also available:
Note that items from the checklist that are not touched from the App during a walk-through will not be shown in the report. This is to avoid that your report is filled with items that are not applicable and irrelevant.
Example 2: working with a general checklist
1. Prepare checklist and project sections online
As an alternative to managing a checklist per project and having the units as checklist categories (see example 1 here above), it is also possible to work with only one general checklist (or a checklist per project type or per discipline) and use this checklist for all your punch lists and field reports of that kind. This checklist could look for example like this:
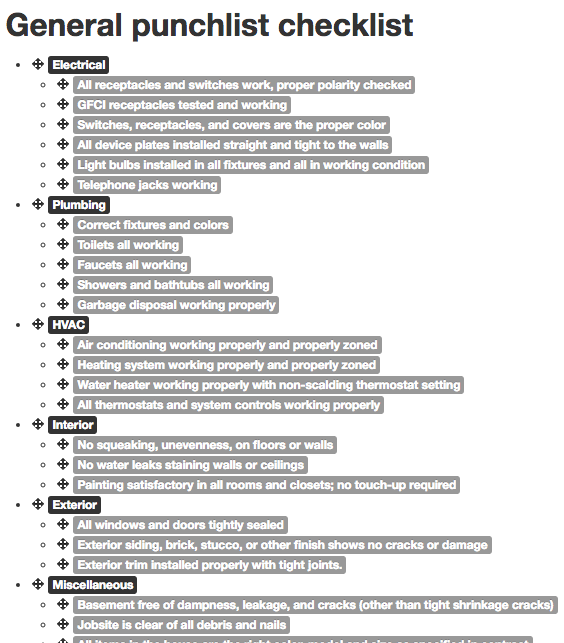
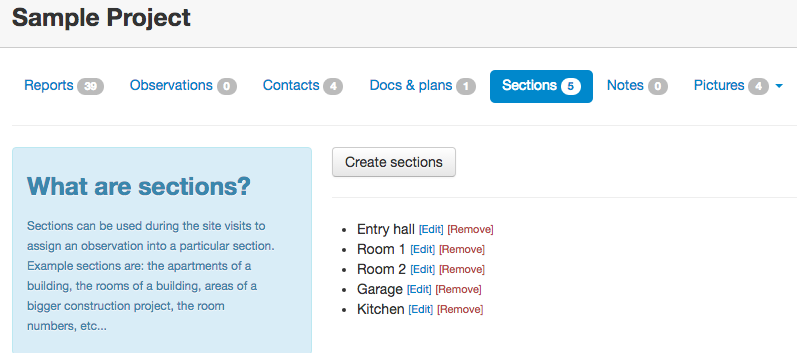
When you observe an issue during your walk through you can then select the item from your checklist or add it as a new item if it’s not in your checklist, and add pictures, texts, assignees, ... When working like this it's good to know that in addition to adding the location on a PDF plan it is also possible to define sections/units on project level from your online ArchiSnapper account:
2. Use this checklist from the App during walk-through
We can now use this general checklist during walkthroughs and manage the locations by pointing them on a PDF and/or selecting the sections. Here again the same principle applies that you can work from the the predefined items from your checklist and add new items/observations for any of your categories (tap ‘add’ button to the right of the category name) if needed. Here’s a video that shows how to use this checklist and add pictures and locations for 2 items:
3. After syncing the report appears in your online account (for further editing and distribution)
The locations on the PDF plans are also available:
PS: You can also upload checklists from excel into your ArchiSnapper account. This might come in handy if you want to prepare a checklist with a lot of units and items. You can prepare the checklist in excel and then upload it into ArchiSnapper. Click here to download a sample file that shows you how to structure your checklist in excel and that you can then upload from here in your online ArchiSnapper account..
